
Windows OS
- Extract the converter Zip file to a local temporary directory.
-
Copy the files and directory to the Assemblies folder of your Repository (
e.g. 'C:\Program Data\Seal Report Repository\Assemblies' ).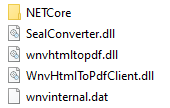
-
If you have a license file (License.slc), copy the file to the Settings folder of your Repository (
e.g. 'C:\Program Data\Seal Report Repository\Settings' ).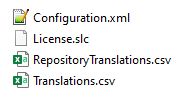
Important Note: Before extracting a downloaded Zip archive it is recommended to unblock the Zip file in case it was blocked.
Right click the Zip file in Windows Explorer, choose 'Properties' from the contextual menu and enable the Unblock option.
Restart your applications, then execute a report and view the result in PDF and Excel.
Linux OS or Azure (.NET Core)
1. Install the PDF Server
The PDF conversion on a Linux OS requires the installation of a PDF Server on a Windows computer (either as a Service or a Web Application).
The HTML to PDF .NET Core Client distribution can be downloaded from the Winnovative web site.
Unzip the files, check the /Server folder, and install the PDF Server:
- as a Windows Service: Check instructions in
'Server\Windows\TCP_WindowsService' ). - as an ASP.Net Web Application: Check instructions in
'Server\IIS\HTTP_WebApp' . - as an Azure Service: Check instructions in
'Server\Azure\CloudService\HTTP_WebRole' .
Important Note: Before extracting a downloaded Zip archive it is recommended to unblock the Zip file in case it was blocked.
Right click the Zip file in Windows Explorer, choose 'Properties' from the contextual menu and enable the Unblock option.
2. Copy and deploy the Converter files
- From your Windows computer, extract the converter Zip file to a temporary directory.
- Copy the files to the Assemblies folder of your Repository (
e.g. 'C:\Program Data\Seal Report Repository\Assemblies' ). - If you have a license file (License.slc), copy the file to the Settings folder of your Repository (
e.g. 'C:\Program Data\Seal Report Repository\Settings' ). -
Deploy the new distribution to your Linux OS:
Run the report 'System\510 Publication - Web Report Server' (we assume that the Task has already been configured to publish on a File or FTP Server) and publish the Assemblies and Settings folders.
Or copy manually the Converter files to the remote publication folders Assemblies and Settings (using a standard FTP client like FileZilla).
3. Change and deploy your Server Configuration
- From your Windows computer, run the Server Manager and select
Configuration->Configure Server... . - Set the property 'Use PDF Client Library' to true.
-
Configure the other properties to match your PDF Server installation:
'PDF Server' (Windows Service), 'PDF Server Port' (Windows Service), 'Service Password', 'Use PDF Web Service' (Web Service), 'PDF Web Service URL' (Web Service) - Save the configuration.
-
Check the PDF Server from your Windows computer:
Run the Report Designer, execute a report and view the result in PDF. -
Deploy the new configuration to your Linux OS:
Run the report 'System\510 Publication - Repository.srex' (we assume that the Task has already been configured to publish on a File or FTP Server) with the restriction 'Repository: Settings'.
Or copy manually the repository Settings\Configuration.xml file to the remote repository Settings directory (using a standard FTP client like FileZilla).
4. Configure the libgdiplus Linux package for the Excel converter
For Linux OS
-
Run a command prompt and execute:
sudo apt update
sudo apt install libgdiplus
For Azure APP Service (.NET Core on Linux)
- Connect to the Azure Portal.
- Select your APP, go to
Configuration , then select the General Settings tab. -
Change Startup Command to
apt-get update && apt-get install -y apt-utils libgdiplus libc6-dev && dotnet /home/site/wwwroot/SealWebServer.dll
Restart your Web Report Server and/or your Seal Report Scheduler on your Linux OS and view a report result in Excel and PDF.